
Simon Randall
MOTION CAPTURE

assignment brief
Select the audio from a scene in a film or television show, then recreate or re-stage it through the use of motion capture and 3D character animation.


My idea is to take a scene from the 2022 film Bullet Train but restage it as the finale of Butch Cassidy and the Sundance Kid, 1969.

Bullet Train, features two brothers going by the names Tangerine & Lemon.
It is Lemon who has a speech explaining how he uses characters from Thomas the Tank Engine to judge people. Re-contextualizing this as the final speech of an action movie feels appropriate for the characters.

Tangerine
lemon
developing the scene
My animatic became a little more fully developed than intended, with camera angles, composition and edits, but it makes things clear. Put together with the blocking plan, action and staging is clear and easy to explain. Whilst the audio provides the cue.

Blocking, this will help with the mocap shoot by letting the performers know where they are in the space. Just have to rehears the cues.
recording the mocap performances
A recording of the mocap recording session with myself - R and Joel - L.
This is the take that is being used.


I went for the full motion track. So, 49 points per character. This meant full hand and finger capture. Using the Motive Mocap system we recorded several takes of the complete scene, which is about forty-five seconds long. Both suits had the full finger tracking set up so, there were forty-nine trackers per character.


The scene includes two guns and a sticker book. This version of Motive can only export one rigid-body object per scene. So, I decided not to track them because it should be a simple task of parenting them to the characters hands.
character creation and rigging
MIXAMO is an Adobe product that provides free 3D characters, with optional poses or animation. You can choose to download with or without a skeletal rig.
You can upload your own character and rig it and use the optional poses and animations or, you can use a character from their library. So, I chose my cast of characters, including a special guest.
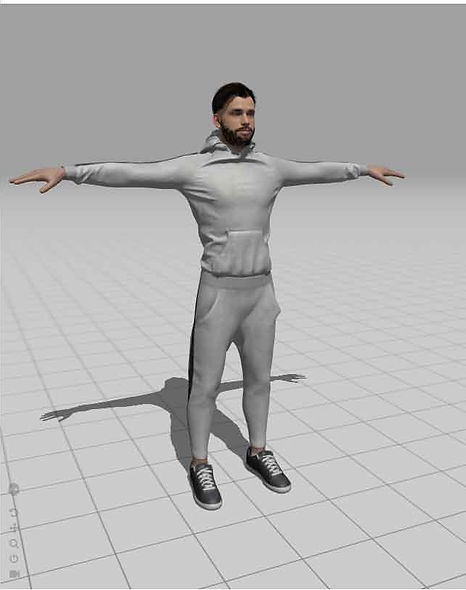
Tangerine 2.0

corpse

lemon 2.0
Some people broke their scenes into sections, to make remembering cues and actions easier. My scene, being short, was recorded in one piece. Then the take that felt the best was cleaned up in the Motive software.


With the full hand tracking there were issues. Tremors, strange joint bending. It could have been the level of calibration but being an older version of Motive there is no single answer.
In the end you just have to remake the character in Motive and keep tweaking.

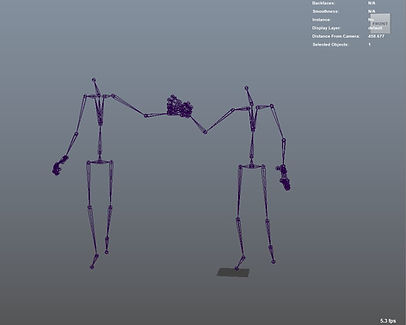


Each tracking marker has it's own 'track' of data. Sometimes there are gaps that need to be filled in. A bit like Tetris, there are individual pieces of tracks that can be placed in the corresponding gaps allowing you to rebuild the motion.
The bigger the gap the harder it is to fix. You will have to keyframe those in Maya.

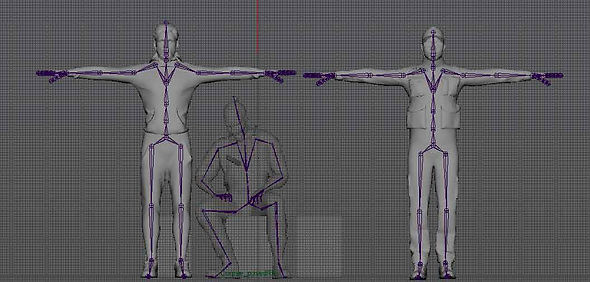
Linking the Motive data to a Maya skeleton is a straightforward matter of selecting each bone in the Motive skeleton and pairing it to the matching one in the Maya skeleton.

After the first Motive skeleton has been swapped to a Maya one I was able to turn that into a template. That could could then be copied onto the second character, because they have identical skeletons.
Then it's a simple matter of selecting the new skeleton and linking it to the correct Mocap animation.

BUILDING OUT THE SCENE

Location is a small room in an abandoned building. Very basic.
For the furniture I just used Sketchfab assets.


Four light sources. A HDR light dome and three area lights, one to light the room and one to fill in shadows and the third to create the light patch on the back wall.


Once the room was laid out it was clear that some changes were needed. When we recorded the mocap we were sat too close together, not leaving room for the corpse, and when we kick the door we hadn't properly set the door position.
CLEANUP
Each character was given it's own animation layer for gross body motion. Then their hands had their own layer. Except Tangerines skeleton had issues so the hands only worked on the main layer.


First issue was re-positioning Lemon when sitting so there is room for the corpse. That was simple, but that new position translates to the rest of his performance. Meaning, he is out of position for the gun handover.


This is where the storyboards become important. I know how the scene is meant to be edited so, I could re-set Lemons position just from that point in the scene. Or, I reposition Tangerine so he is now in a better position for the door kick.
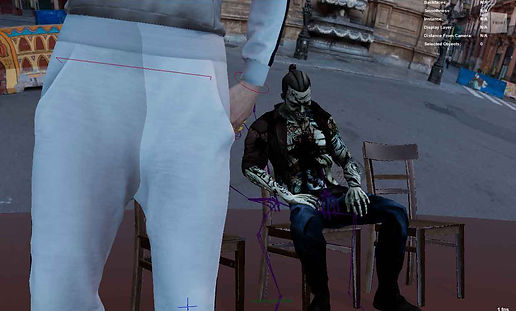


Hands feet and shoulders are the areas that tend to need the most attention. Feet in this case aren't as important because they aren't visible. Hands and fingers are important. Using the video of the capture section I can use a new layer and re-pose the fingers to fit the performance and fix bad data.


Shoulders are interesting. Most of the motion is placed on the main joint but that isn't realistic. You need two joints, shoulder and clavicle, to achieve full rotational motion. This means I have to go in and adjust the top, inner shoulder joint to fix hunching and strange rotation.


FINGERS
Depending on how accurate your tracking data is this can be the toughest job. First you fix broken fingers. Then you pose fingers, to follow the performance. Then, you may need to pose them to grasp and release props.


GRABBY HANDS
My version of the scene calls for Tangerine to pick up two shotguns and hand one to Lemon who, initially, is holding a sticker book.

One 'locator' per gun and one for the table. Although the Tangerine rig was problematic so I used two 'locators' for the table, this meant each gun had unique locators. There were no locators in my character rigs so I used the wrist effectors.


Over three frames the guns switch from being parented to the table to the hands. Hand placement and orientation of the guns is important for the next step.

The original mocap data for the hands lined up nicely but then I moved the Lemon character for better spacing at the start of the scene. So, he had to be 'put back' for the final part of the scene. Thankfully the storyboard is edited around key actions.


What remained were the left hands being placed on the guns and tracking. This also required the guns being reorienting to fix collisions. This ended up being done manually. Hopefully this will get smoothed out at the end.
FIRST PASS
A quick Playblast render throws up some issues that weren't obvious in the viewport. Strange behaviour when the guns are picked up and arm twists that I thought were fixed. The foot placement is still an issue. The passing of the gun between Tangerine and Lemon looks good though.
So, more manual tweaking and then we will see what happens after applying smoothing.
The TAO of THOMAS
The heart of the scene is Lemons belief in the Tao of Thomas (the Tank Engine) as manifested by his sticker book. So, obviously, I had to make the prop.


I found some images of vintage stickers, even matching the one in the film, and just folded a plain in Maya. I even made in insert page but decided it wasn't needed.

This was then parented to a hand and keyed to appear and disappear. This was due to the characters clothes just being a skin and pulling it out of his body didn't seem right. Then it was a case of editing around the action to hide the trick.
RENDERING and EDIT
Normally you are expected to create a render sequence in Maya. With a camera for every shot lined up one after the other. This is fine if you broke your mocap recording up into sections with all the cues accurately timed but, I recorded my scene in one continuous take, meaning that the performance doesn't always match the cues.

This meant that the timing of some shots would overlapped, which you can't do in the sequencer. This forced me to render each shot separately. GPU rendering made this less time consuming. Also I'm used to the extra freedom of editing in Davinci Resolve. You can probably set up a batch render for all the cameras but I like to check each shot and make corrections as needed.
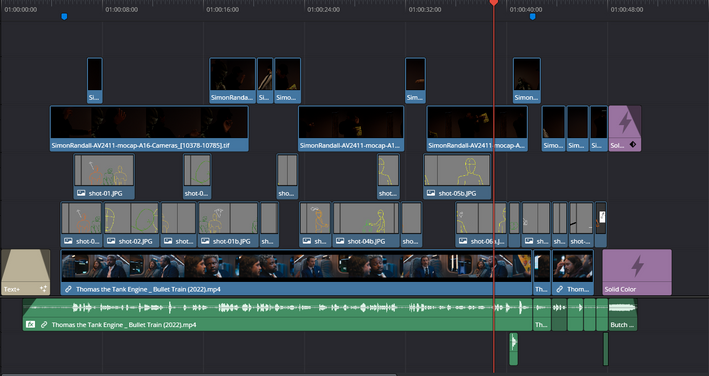
A slightly different opening shot to set the scene, revealing the katana and a slower reveal of the room. (then the shot was shortened for pacing).

Because the handover of the gun worked so well I deviated from the storyboard and used one wide shot to show the action in full.

The final audio clip ended up being from Butch Cassidy & the Sundance Kid, creating the authentic ending. In addition there was the door kick sound that came from Davinci Resolves sound library and a single gunshot that came from the BBC Sound Library.
The stray bullet hit is a png on alpha piece of clip art that was graded and placed on the wall. Just a matter of setting scale to 0% than next frame set to 100%, matched to the sound cue.

Final edit
After some feedback I graded the footage to increase the levels and improve visibility.
Still a few issues but it works.
stock asset credits
Adam, Alex, Yaku J Ignite. Characters
Mixamo. (n.d.). Retrieved from https://www.mixamo.com/#/
Bullet holes transparent background PNG clipart | HiClipart. (n.d.). Retrieved from https://www.hiclipart.com/free-transparent-background-png-clipart-laorh
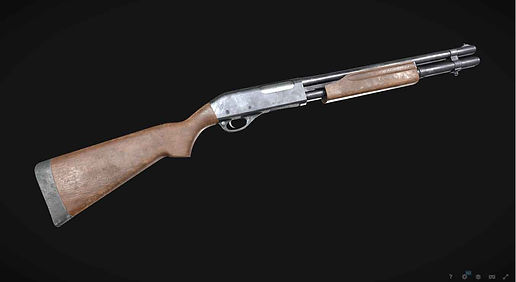
"Shotgun" (https://skfb.ly/o7OvI) by Jonathan Steylaerts is licensed under Creative Commons Attribution (http://creativecommons.org/licenses/by/4.0/).
"Old table" (https://skfb.ly/o6CUX) by EricKos is licensed under Creative Commons Attribution (http://creativecommons.org/licenses/by/4.0/).
"Wooden Chair" (https://skfb.ly/or877) by Zian is licensed under Creative Commons Attribution (http://creativecommons.org/licenses/by/4.0/).
Sound Effects
bbc.co.uk – © copyright [2014] BBC
Twentieth Century Fox ; a George Roy Hill-Paul Monash production ; written by William Goldman ; produced by John Foreman ; directed by George Roy Hill. (2000). Butch Cassidy and the Sundance Kid. Beverly Hills, Calif. :20th Century Fox Home Entertainment,
Leitch, D. (Director). (2022). Bullet Train. [Film]. Sony Pictures.